Ops meant to ask, resistor, 1/8 or 1/4 or what size, carbon film? or is there other kinds? The ones I bought at RS were 150-ohm 1/8-watt carbon-film resistors.
- Welcome to Bachmann Online Forum.
News:
Please read the Forum Code of Conduct >>Click Here <<
This section allows you to view all posts made by this member. Note that you can only see posts made in areas you currently have access to.
#76
HO / Re: Help Need HO Scale Steam Locomotive that steams and whistles
September 30, 2014, 04:45:01 PM #77
HO / Re: Help Need HO Scale Steam Locomotive that steams and whistles
September 30, 2014, 04:39:57 PM
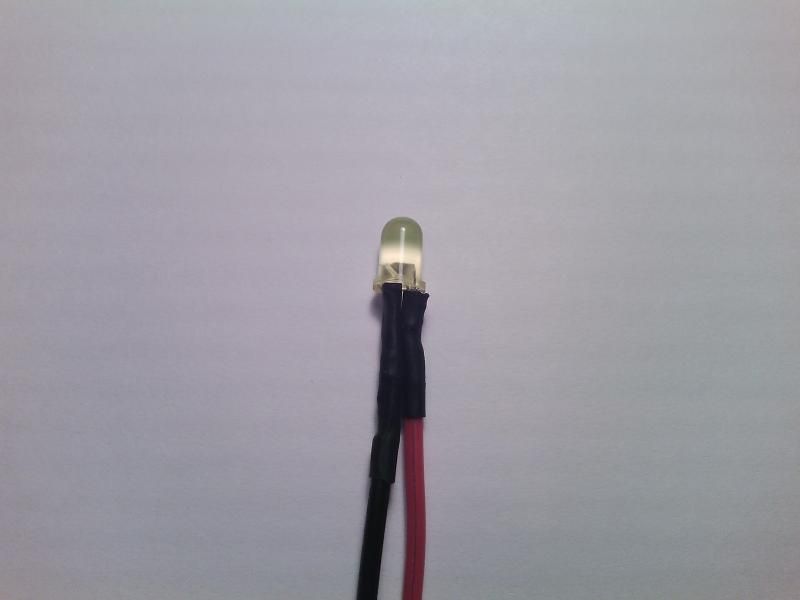
I watched a how to video on wiring LED's and resistors. A bit confusing however I did go to RS bought some 5 mm and 3 mm LED's to experiment with. Knowing the right size resistor is important from what I gathered. RS employee had no idea what size I needed. I used a 150 resister with the 5 mm LED, soldered it up, put it to a 4.5 volt adapter wall wart (I think that is what this adapter would be called) and bingo! it works and doesn't get hot at wire connections. It also works on a 3 volt wall wart. Here is the end result.
I want to make a "string of lights" to go on little trees at Jamestown, I will probably use 3 mm LED's, 5mm are a bit too big in parallel. I know the Ohms Law comes into play with this and I have found online sites to input the info to tell me the size resistor I need per LED. It didn't tell me how many resistors or size for several LED's in a row. I also would like to add street lights like Jonathan has made just a little larger. I think you will tell me it all depends on how many volts or ohms or what ya call them totals divide by something and this is what you need. Right? So here are my questions.
1. Do I need a resistor for each led I run in parallel? If so how many?
2. Jonathan used 30 gauge magnet wire for the street lamps, is that something I should use or will normal stranded 22-24 gauge wire work? The street lights I hope to make will be larger. Jamestown is not to scale to anything so making them to HO scale is not necessary.
3. What wattage soldering iron would do for the light weight soldering I do?
4. I bought (thought they were cool looking) 3 mm Ambient Light Sensor LED's at RS. I wired it up the same as the 5 mm however it doesn't work. Is this Ambient light sensor a special LED? Looks like the 3 and 5 mm except they are round and this is a square shaped. this is the info on the bag. 3 mm ambient light sensor, Dark Current 0 1uA, supply voltage 3 OVDC to 24 VDC.
I should point out that I used that piece of crap soldering iron to make one led light connection. Won't tell you how long that took with such a worthless iron but it did work at the end. I am still "shopping" for that Weller. I just not sure what wattage I need for this light weight work or if I should invest in a station, or just make do with what I have. You see I have decided (over this past week) I am moving back to NY. Was born and raised there and plan on croaking there, hopefully not for a long time (croaking), but now I need to save save save to do this. Here I am improving my Jamestown when I will be moving but trust me, Jamestown will be one of the very high on the list that is going. What ever I can stuff in my F150 (has cap on it) is going. That I will ship and me and my cat will fly home. It won't happen for 6 or more months but it will happen and Jamestown will be in that truck! So spending money right now on a solder station which would be nice is maybe not the best time to purchase.
I think that is about it for questions today. Thanks for any advice/help you guys rock (as usual).
#78
HO / Re: Help Need HO Scale Steam Locomotive that steams and whistles
September 28, 2014, 12:12:16 AM
Hey guys, been busy working on Jamestown. Last night I soldered some wires that went to one of my lighted trees. they are the tiny I guess LEDS that do run in parallel on very small wire. Yikes what a test of my patience. I need to figure out a better way of doing this. trying to hold tiny objects and use a scalding hot iron, well it does lend it's self some excitement in my life! Today I think I solved one problem doing that small stuff, I do have a very tiny vise. that does come in handy. the other is I have some nice tweezers and I think if I glue some of the non skid stuff you use to keep things from moving around, this might help hold those tiny bulbs. It sure won't hurt to try that. I know they sell those "creatures" that have many arms sticking out with little vises or clips to hold things in place but honestly, it isn't in my budget or need to have one of those. Now the soldering station. wouldn't you know I JUST ordered a wire spiral holder to hold this darn cheap iron! So I will just keep looking for a reasonable Weller. There are two I am eye balling, one is red/black, has 3 LED lights to help see your work? I could use extra light but would they interfere with using it? The other is a blue/black one. A little more money so not sure if I need to invest in that one or not. Are all Weller tips interchangeable? Right now Amazon does seem to have the best price but I haven't gone to local stores here to price any. It is not on my absolute must have list at the moment. But it is not far from that list.
I also read/heard filing/sanding was not a good thing for the tip, but I did see some video the guy used a wire brush to clean the tip and side of the iron (where it gets hot), it was to remove any slag build up. That seemed to do something to this crappy tip. Once I did that, fluxed, sponged it, that bright shinny solder showed up. But it is still not working like I believe it should. So moving along......
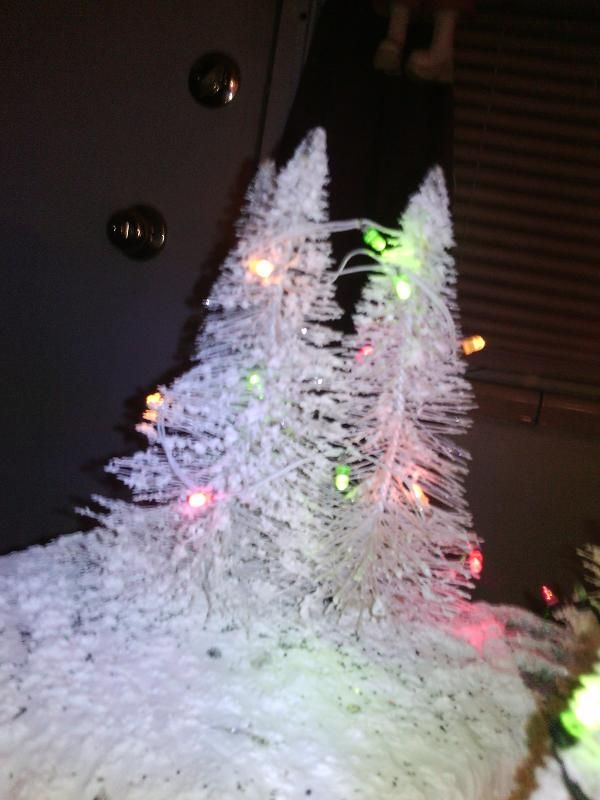
Back to those darn lights they are running parallel are connected to a ac/dc adapter for 3 volts. I honestly don't know what volts they are, I wanted to make more strings of them as they are tiny little lights but not sure if it is worth trying. Lemax lights and similar strands of lights are 5 to 8 dollars a strand. I was hoping to make my own cheaper.
These are store bought lights that came on the tree.

D - You totally lost me on your last comment about the barrier blocks! I appreciate you explaining it but it's like some foreign language your are speaking! The track power is a done deal. It is wired to the original Bachmann power pack I have and it works just fine for what I intend to use it for. NO other wire will be connected to it. Unscrewing the two leads when I put this away is simple enough for me.
I guess I just have to stop while I am ahead on the wiring stuff. Trying to learn from descriptions isn't going to work. It's okay, what I have now is workable. Soldering connections, adding more quick disconnects will improve what I have now and will look better than twisted wire and electrical gobs of tape! (none of the wiring is exposed, I just hate wires showing and untidy wiring.)
I keep thinking I want to expanded the back part of the layout with a longer tunnel, incorporating it into either ice mountain or Tower mountain or both. The back length is more or less wasted space. The tunnel now is 16-18 inches long, I can expand that to 36 inches, giving it a nice long tunnel for the train, a place to set more houses, people, pets or landscape. It's just a thought, I get many of those (thoughts) some turn out good some not so good!
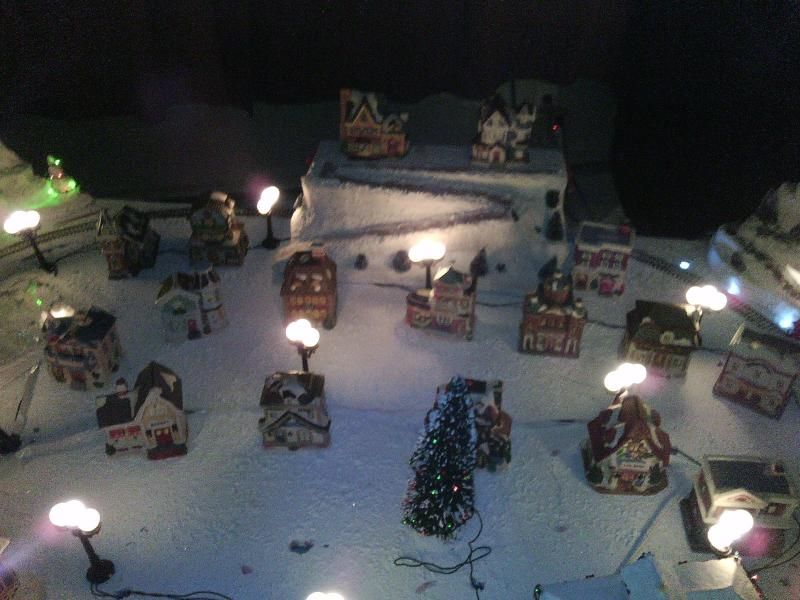
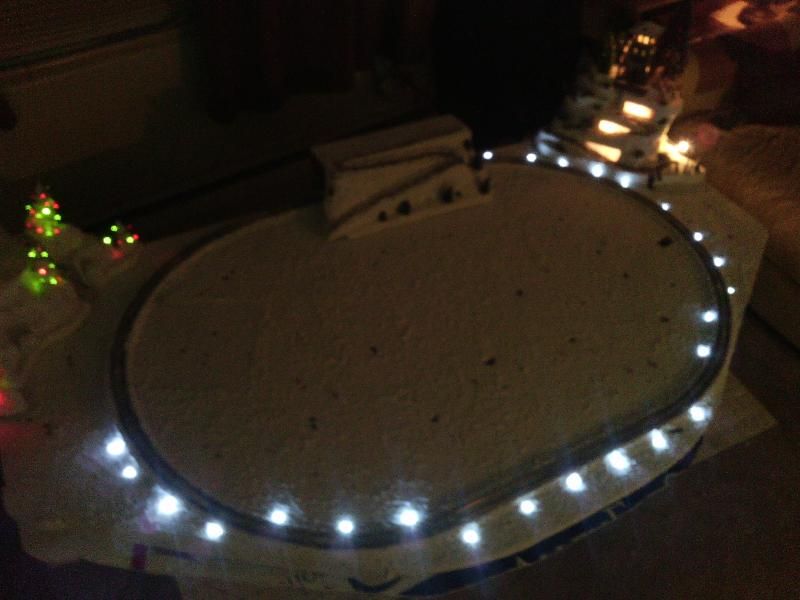
Here is how the layout is now, the back will be flat against the wall once in place so...... not sure what I will do. Any suggestions?
I would love to make street lights like Jonathan has done on his layout. OMG they are terrific. That is sorta where I was going with those wheat grain lights(bulbs/lamps). After reading his post on he did it, I understood up until he mentioned resistors! how do you tie in all the street lights to a power source? Guess that's one of those things I don't get or understand how to. Any good how to videos out there that might make sense to me? He used 30 gauge magnet wire and Radio Shack actually carries it, 4 different color/gauges but for 9 dollars I didn't buy any since I have no idea how to make us it or how to make the street lights. No one at RS had any idea how to use it.
Later gators.
I also read/heard filing/sanding was not a good thing for the tip, but I did see some video the guy used a wire brush to clean the tip and side of the iron (where it gets hot), it was to remove any slag build up. That seemed to do something to this crappy tip. Once I did that, fluxed, sponged it, that bright shinny solder showed up. But it is still not working like I believe it should. So moving along......
Back to those darn lights they are running parallel are connected to a ac/dc adapter for 3 volts. I honestly don't know what volts they are, I wanted to make more strings of them as they are tiny little lights but not sure if it is worth trying. Lemax lights and similar strands of lights are 5 to 8 dollars a strand. I was hoping to make my own cheaper.
These are store bought lights that came on the tree.


D - You totally lost me on your last comment about the barrier blocks! I appreciate you explaining it but it's like some foreign language your are speaking! The track power is a done deal. It is wired to the original Bachmann power pack I have and it works just fine for what I intend to use it for. NO other wire will be connected to it. Unscrewing the two leads when I put this away is simple enough for me.
I guess I just have to stop while I am ahead on the wiring stuff. Trying to learn from descriptions isn't going to work. It's okay, what I have now is workable. Soldering connections, adding more quick disconnects will improve what I have now and will look better than twisted wire and electrical gobs of tape! (none of the wiring is exposed, I just hate wires showing and untidy wiring.)
I keep thinking I want to expanded the back part of the layout with a longer tunnel, incorporating it into either ice mountain or Tower mountain or both. The back length is more or less wasted space. The tunnel now is 16-18 inches long, I can expand that to 36 inches, giving it a nice long tunnel for the train, a place to set more houses, people, pets or landscape. It's just a thought, I get many of those (thoughts) some turn out good some not so good!
Here is how the layout is now, the back will be flat against the wall once in place so...... not sure what I will do. Any suggestions?

I would love to make street lights like Jonathan has done on his layout. OMG they are terrific. That is sorta where I was going with those wheat grain lights(bulbs/lamps). After reading his post on he did it, I understood up until he mentioned resistors! how do you tie in all the street lights to a power source? Guess that's one of those things I don't get or understand how to. Any good how to videos out there that might make sense to me? He used 30 gauge magnet wire and Radio Shack actually carries it, 4 different color/gauges but for 9 dollars I didn't buy any since I have no idea how to make us it or how to make the street lights. No one at RS had any idea how to use it.
Later gators.
#79
HO / Re: Help Need HO Scale Steam Locomotive that steams and whistles
September 26, 2014, 10:30:02 PM
What a day it's been! My front tooth that is capped the cap fell off. Not knowing what to do. I got my super glue out to glue it in place. pricked a hole in the new tube of super glue, it rushed out. gluing my two left fingers together and my two right fingers together. After what seemed like an eternity and a half bottle of acetone my fingers were unstuck. Gluing the cap on has been successful so far, it hopefully with stay on until I get into the dentist.
Then after researching little wheat grain LEDs on line, I took a chance and went to radio shack to see if they had somethings I was wanting. 2 out of 3 items purchased are not what I wanted, can't use and not sure if they will take them back. I thought I knew what I wanted but as it turns out I guess I don't have a clue. I went there to get the wheat grain bulbs. I should have stayed with the ones I found at RS but then I found ambient light senor bulbs, they were clear a tad bigger I thought I could use them the same as the wheat grain ones but guess not. Sigh! I also bought what I thought was a terminal block. Its a plastic strip with 6 sets of screws. I thought (once again my mistake thinking) that this would work for me to join many sets of small wire lighting items and power it with one main line. That didn't work. I guess my problem is I am being cheap and trying to use one Lemax adapter to power all the lighting I have. One Lemax adapter will basically run 4 items. I have 10 or more to supply power to. So it was not a rewarding trip to RS for me. Most of the day was a crappy one! oh the soldering iron! !%#^& is what I think of it. I put on the new tip, watch how to videos on tinning it. It looked like it tinned nicely. I put it away and then when I got back from RS and attempted to use the piece of crap, the tip is dull, what I think is oxidized and if I put flux on it and wipe it with water it gets shiny but it really doesn't hold the solder on it and frankly I think I just have to give it up and go buy a better one than this! I found this review on the piece of junk I have when trying to find a replacement tip today.
"I have been soldering circuits for a while, and use a nice Weller Soldering station. Unfortunately when I moved away from home for college, I didn't bring it."(he went and bought the one I have 10 bucks at walmart) he continues on to say "I wouldn't even recommend it for a one time use. Especially do not buy if you are new to soldering. Borrow someone's soldering station so you can get a feel for how it should work. That way, you won't think soldering is as horrible as it was with this." my sediments exactly! horrible experiences!
Tomorrow I will be heading out to look for a Weller, guys who have used them over and over for years and years swear by them so Don and Jbrock I do listen and take in your advice.
So I am at a stand still so to speak. If I bought books on the wiring and stuff I still wouldn't have a clue what it says. Today, after reading some post about using the DC side Bachmann power supply I hooked up two tiny street lights to it. Ah they no longer work. That putrid smell of burned wires isn't pleasant. So I learned a lesson there.
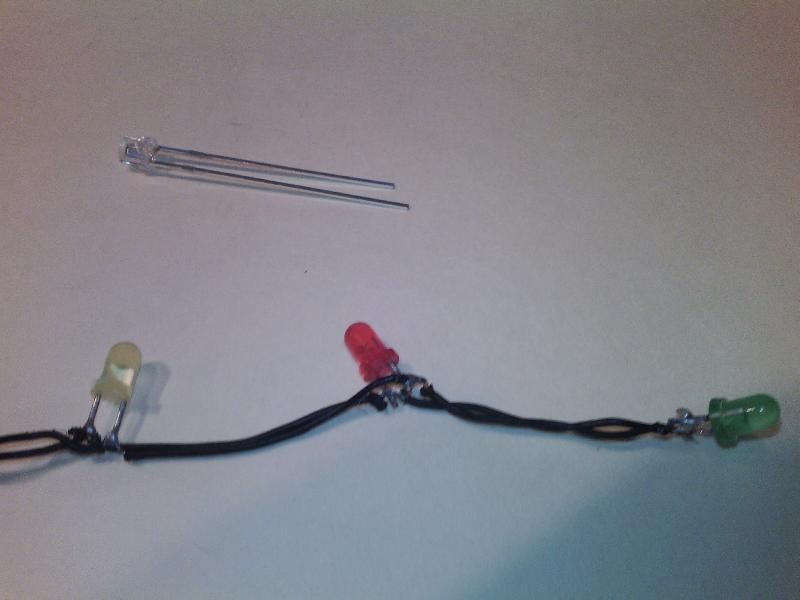
This is the wheat grain bulbs I was hoping to find, wanted some in clear and RS didn't have clear so I bought the other thing that is a clear light or so I thought, it doesn't work. If any one could use them PM me and I will send them to you free of charge. I used one so I can't return them. I do need to know about these lights, when they are on and you touch the connection they are burning hot. Is that normal? Is that a fire hazard? Is too much power going to them? I have others and they all seem to do the same thing, hot.
My cap just feel off my tooth, great!
Well don't need it to go check out Micro-Marks, thanks for the heads up on that site!
Then after researching little wheat grain LEDs on line, I took a chance and went to radio shack to see if they had somethings I was wanting. 2 out of 3 items purchased are not what I wanted, can't use and not sure if they will take them back. I thought I knew what I wanted but as it turns out I guess I don't have a clue. I went there to get the wheat grain bulbs. I should have stayed with the ones I found at RS but then I found ambient light senor bulbs, they were clear a tad bigger I thought I could use them the same as the wheat grain ones but guess not. Sigh! I also bought what I thought was a terminal block. Its a plastic strip with 6 sets of screws. I thought (once again my mistake thinking) that this would work for me to join many sets of small wire lighting items and power it with one main line. That didn't work. I guess my problem is I am being cheap and trying to use one Lemax adapter to power all the lighting I have. One Lemax adapter will basically run 4 items. I have 10 or more to supply power to. So it was not a rewarding trip to RS for me. Most of the day was a crappy one! oh the soldering iron! !%#^& is what I think of it. I put on the new tip, watch how to videos on tinning it. It looked like it tinned nicely. I put it away and then when I got back from RS and attempted to use the piece of crap, the tip is dull, what I think is oxidized and if I put flux on it and wipe it with water it gets shiny but it really doesn't hold the solder on it and frankly I think I just have to give it up and go buy a better one than this! I found this review on the piece of junk I have when trying to find a replacement tip today.
"I have been soldering circuits for a while, and use a nice Weller Soldering station. Unfortunately when I moved away from home for college, I didn't bring it."(he went and bought the one I have 10 bucks at walmart) he continues on to say "I wouldn't even recommend it for a one time use. Especially do not buy if you are new to soldering. Borrow someone's soldering station so you can get a feel for how it should work. That way, you won't think soldering is as horrible as it was with this." my sediments exactly! horrible experiences!
Tomorrow I will be heading out to look for a Weller, guys who have used them over and over for years and years swear by them so Don and Jbrock I do listen and take in your advice.
So I am at a stand still so to speak. If I bought books on the wiring and stuff I still wouldn't have a clue what it says. Today, after reading some post about using the DC side Bachmann power supply I hooked up two tiny street lights to it. Ah they no longer work. That putrid smell of burned wires isn't pleasant. So I learned a lesson there.
This is the wheat grain bulbs I was hoping to find, wanted some in clear and RS didn't have clear so I bought the other thing that is a clear light or so I thought, it doesn't work. If any one could use them PM me and I will send them to you free of charge. I used one so I can't return them. I do need to know about these lights, when they are on and you touch the connection they are burning hot. Is that normal? Is that a fire hazard? Is too much power going to them? I have others and they all seem to do the same thing, hot.

My cap just feel off my tooth, great!
Well don't need it to go check out Micro-Marks, thanks for the heads up on that site!
#80
HO / Re: Help Need HO Scale Steam Locomotive that steams and whistles
September 26, 2014, 12:35:02 PM
I looked up Weller irons, the soldering iron I have is a pencil type and I like the feel of it. The Weller's seem to be more like a gun, with trigger. Are they heavy? They look to be awkward to hold and use for someone with small hands? I also noticed while searching, there are different watts, what wattage would be what I would need? All the wires I use are 22 awg up to maybe 16.
This morning I told myself, where did you put that spare tip that came with my iron? and hey I found it! Until I decide what to do with either a new iron or this one, I will use this one HOWEVER I will properly prepare the tip and take better care of it. I just didn't know any better the first go around.
As for the wiring, I wish there was a place here in Reno who could give me some expert advice regarding the wiring I am trying to produce. Yes there is a Radio Shack here, but the inexperienced help is no help whats so ever. There is an electronic store and I went there and they were quite rude. Charged me $5.00 cutting fee of wire I wanted (I didn't know Ace cuts if for free). I asked about what I was trying to achieve and the guy well lets say he was more worried someone was going to steal his stool behind the counter he was sitting at, as he kept gravitating to it.
D I get the terminal blocks, that is what I thought of but how do I supply power to it? run the adapter hot and ground to each side of the terminal? and the UL plug goes to the wall power. What the heck is a wall wart? I thought you were saying Walmart at first! .
.
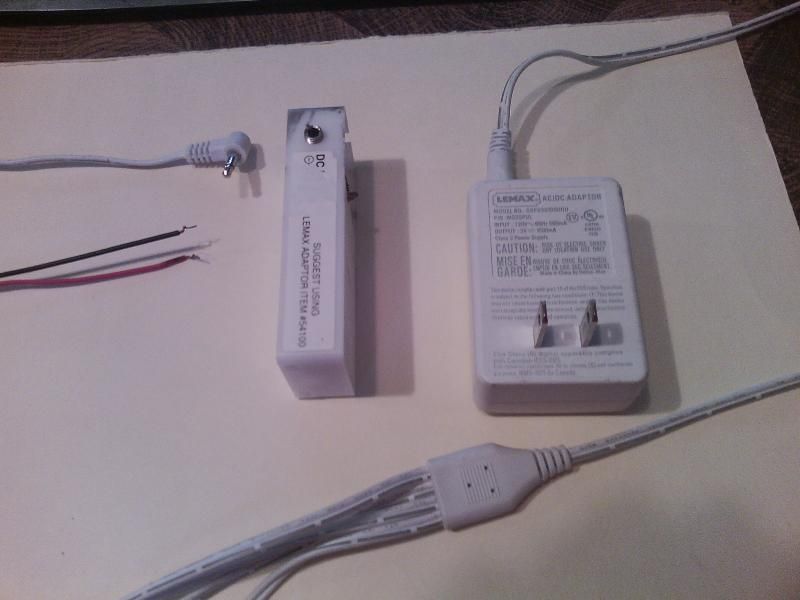
Here is a picture of the power setup I use. The AC/DC adapter obviously gets plugged into house current. there are four leads off of that adapter. All had the pin plug to plug into the white boxes that were attached to what ever they powered. Like a strand of lights for instance. I have wired up the quick disconnect plugs to those leads to supply power over to Ice Mountain and the stings of lights on it. Also one goes to Tower Mountain to power the trees lights and spot lights. I like the quick disconnect method as Ice mountain and Tower mountain are removed and stored separately. To hook them up next time just snap the two connections together. Where I am not sure of is, if I snip the wire off before the 4 leads and hook it up to hot/ground on a terminal block and then run from there the hot/ground for each of the quick connectors? Gosh am I explaining that okay? I also don't know how many items can I run off that adapter? obviously 4 items but how many more? I don't have an omh meter and wouldn't know how to use one any how. I just know from experience if I don't run the lights through that adapter I will fry them.
Terminal connectors I have, I need smaller ones as the wire I am using is 22 awg and crimping them to ones to big for the wire stinks! Luckily I am now schooled in soldering the joints and shrink wrapping them so most connections are done that way. The only place right now I need terminals is to the power supply for the train. If I go to a terminal block/strip I will invest in the correct size.
The track night mare is solved. Little Prairie just zips around that track like no tomorrow. FINALLY success where that is concerned. Little by little Jamestown is coming along.
This morning I told myself, where did you put that spare tip that came with my iron? and hey I found it! Until I decide what to do with either a new iron or this one, I will use this one HOWEVER I will properly prepare the tip and take better care of it. I just didn't know any better the first go around.

As for the wiring, I wish there was a place here in Reno who could give me some expert advice regarding the wiring I am trying to produce. Yes there is a Radio Shack here, but the inexperienced help is no help whats so ever. There is an electronic store and I went there and they were quite rude. Charged me $5.00 cutting fee of wire I wanted (I didn't know Ace cuts if for free). I asked about what I was trying to achieve and the guy well lets say he was more worried someone was going to steal his stool behind the counter he was sitting at, as he kept gravitating to it.
D I get the terminal blocks, that is what I thought of but how do I supply power to it? run the adapter hot and ground to each side of the terminal? and the UL plug goes to the wall power. What the heck is a wall wart? I thought you were saying Walmart at first!
. 
Here is a picture of the power setup I use. The AC/DC adapter obviously gets plugged into house current. there are four leads off of that adapter. All had the pin plug to plug into the white boxes that were attached to what ever they powered. Like a strand of lights for instance. I have wired up the quick disconnect plugs to those leads to supply power over to Ice Mountain and the stings of lights on it. Also one goes to Tower Mountain to power the trees lights and spot lights. I like the quick disconnect method as Ice mountain and Tower mountain are removed and stored separately. To hook them up next time just snap the two connections together. Where I am not sure of is, if I snip the wire off before the 4 leads and hook it up to hot/ground on a terminal block and then run from there the hot/ground for each of the quick connectors? Gosh am I explaining that okay? I also don't know how many items can I run off that adapter? obviously 4 items but how many more? I don't have an omh meter and wouldn't know how to use one any how. I just know from experience if I don't run the lights through that adapter I will fry them.
Terminal connectors I have, I need smaller ones as the wire I am using is 22 awg and crimping them to ones to big for the wire stinks! Luckily I am now schooled in soldering the joints and shrink wrapping them so most connections are done that way. The only place right now I need terminals is to the power supply for the train. If I go to a terminal block/strip I will invest in the correct size.
The track night mare is solved. Little Prairie just zips around that track like no tomorrow. FINALLY success where that is concerned. Little by little Jamestown is coming along.
#81
HO / Re: Help Need HO Scale Steam Locomotive that steams and whistles
September 26, 2014, 12:21:46 AM
yes there is a short screw that holds it in. I know this one wasn't very expensive. Will check around for the other brands. Thanks!
#82
HO / Re: Help Need HO Scale Steam Locomotive that steams and whistles
September 25, 2014, 11:19:28 PM
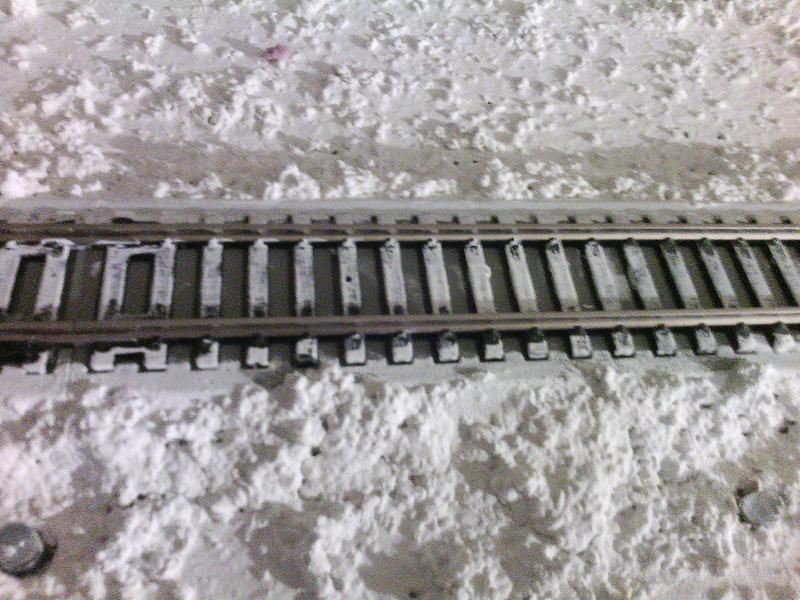
Back with some update photos. In my last post I said I was resurfacing the platform and I did and it came out really good. Then I adhered the track down. The latest is adding the ambient running lights around the track. I had to redo them due to this new track. I put out the Ice Mountain and the Tower Mountain, and set the tunnel in place. I also "ballast" the track, I used my ballast creation it is a one of a kind. I tried the gravel, sand etc mix I had made originally but didn't like the effect and to be honest I would have been still doing it after Christmas. So I just mixed up the sand/gravel mix with the popcorn compound, some acrylic flat white paint and water. It matches the platform surface. I couldn't decide what to do on the inside rail ties so I dabbed it with white paint. I do need to give the track a good cleaning as I can see there is some paint on the rails. I do like how it turned out. Will take some daytime photo and post them another day.
Thanks for your assistance!
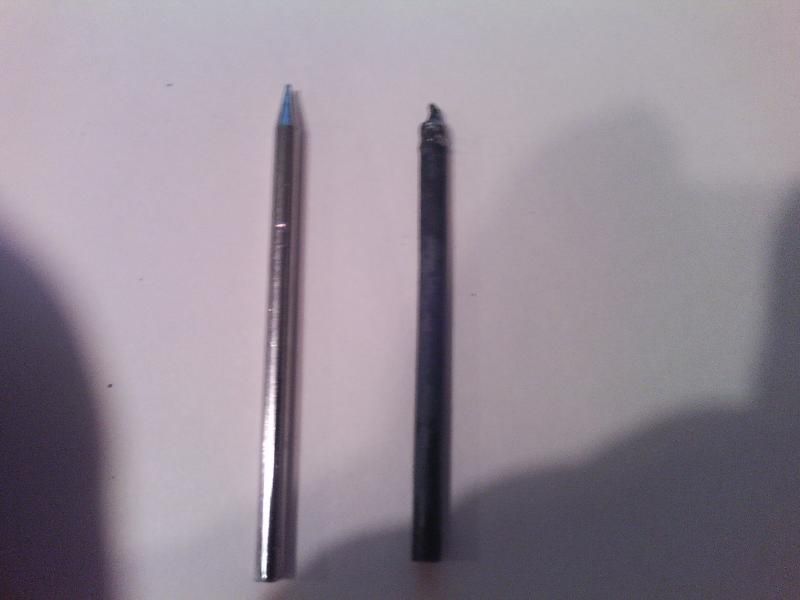
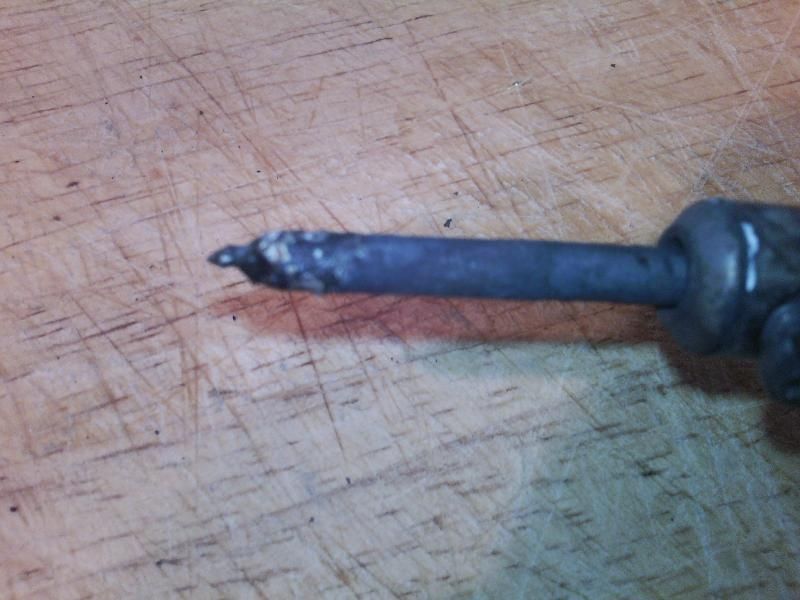
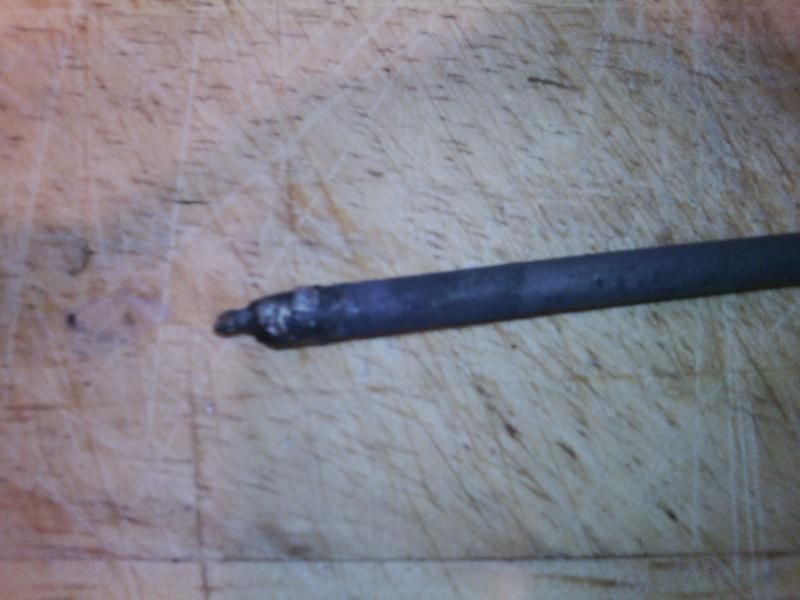
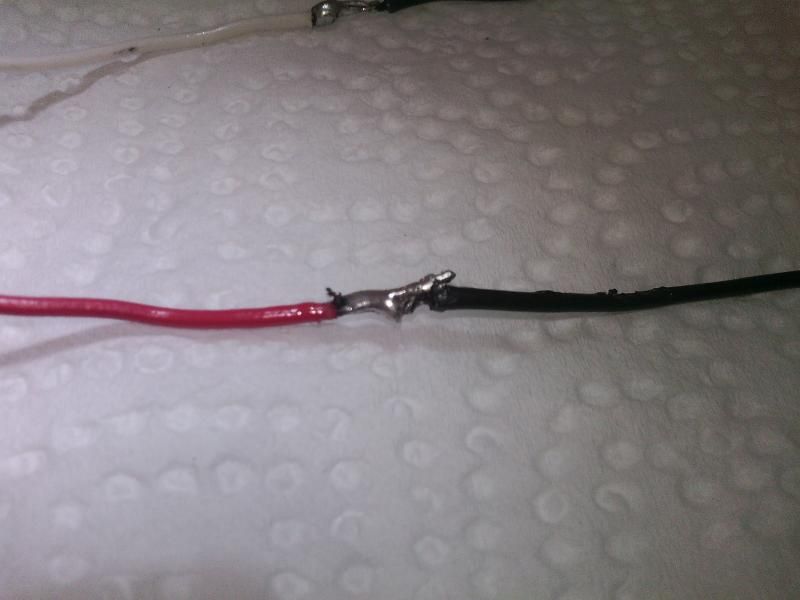
Now I need advice/help on this new development. I do believe it's called not taking care of your soldering iron! the tip is screwed up, it does not get hot, I have to melt the solder on the side of it to get anything out of it. As you can see it does come off and I thought maybe it just needs filing? I don't have any way of grinding it. Should I just buy a new tip? If I do is there different size tips or are they standard size? I have lots of soldering ahead, now that it isn't so scarey, I ordered more of these quick disconnect plugs and some small gauge wire to go with them. Each light set, or string of lights I am using them so when it's time to dismantle every thing I just unsnap and put them away. The LED Christmas strand lights that light each house is normal UL Plug and they are plugged into my power bar. The tiny lights are all hooked to an adapter I think 3 volt and the adapter gets plugged into the power bar as well. Eventually once every thing is hooked/wired up, one flip of the power bar switch and Jamestown is lite up. I would like to run each of these quick disconnects to some kind of power strip that all lead to the adapter but I don't know if that is feasible or not.
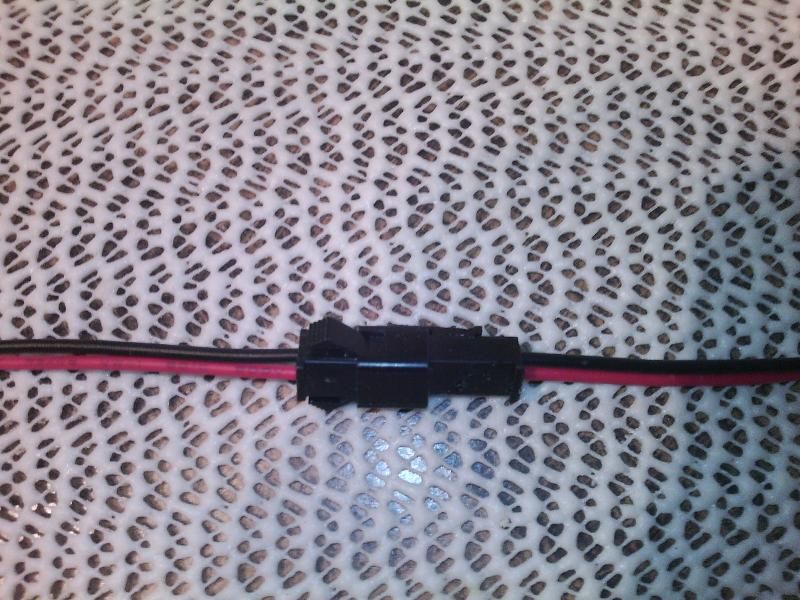
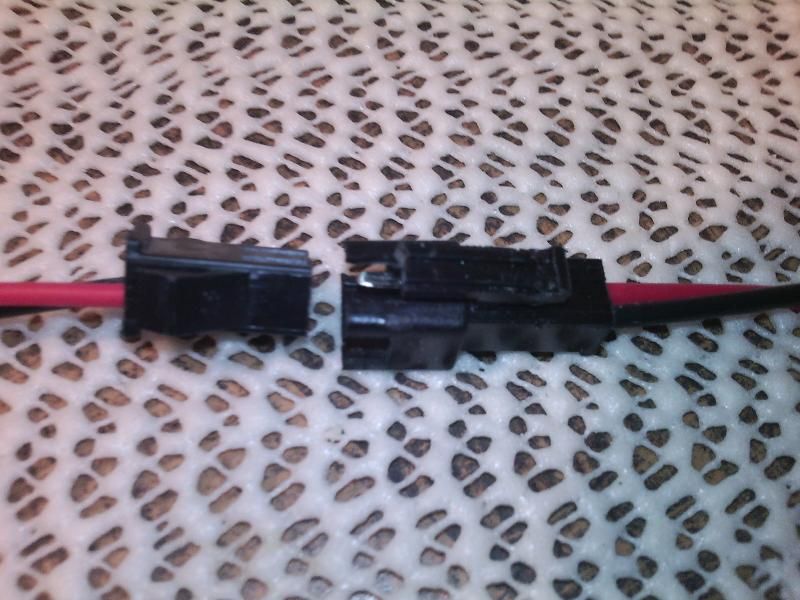
Connectors I am using.


Thanks for your assistance!
Now I need advice/help on this new development. I do believe it's called not taking care of your soldering iron! the tip is screwed up, it does not get hot, I have to melt the solder on the side of it to get anything out of it. As you can see it does come off and I thought maybe it just needs filing? I don't have any way of grinding it. Should I just buy a new tip? If I do is there different size tips or are they standard size? I have lots of soldering ahead, now that it isn't so scarey, I ordered more of these quick disconnect plugs and some small gauge wire to go with them. Each light set, or string of lights I am using them so when it's time to dismantle every thing I just unsnap and put them away. The LED Christmas strand lights that light each house is normal UL Plug and they are plugged into my power bar. The tiny lights are all hooked to an adapter I think 3 volt and the adapter gets plugged into the power bar as well. Eventually once every thing is hooked/wired up, one flip of the power bar switch and Jamestown is lite up. I would like to run each of these quick disconnects to some kind of power strip that all lead to the adapter but I don't know if that is feasible or not.


Connectors I am using.


#83
HO / Re: Help Need HO Scale Steam Locomotive that steams and whistles
September 21, 2014, 10:32:07 PM
The u Shape was out of necessity. Seems I had every other size/color with the fork except the size I needed. Common sense told me to just snip part of it out, just enough to go around the screw. The screws do not come out completely don't ya know. I would had rather have a bit small connector but I didn't. It works just great for what I need it to do. Shrink tubing is another one of those genius ideas someone had.
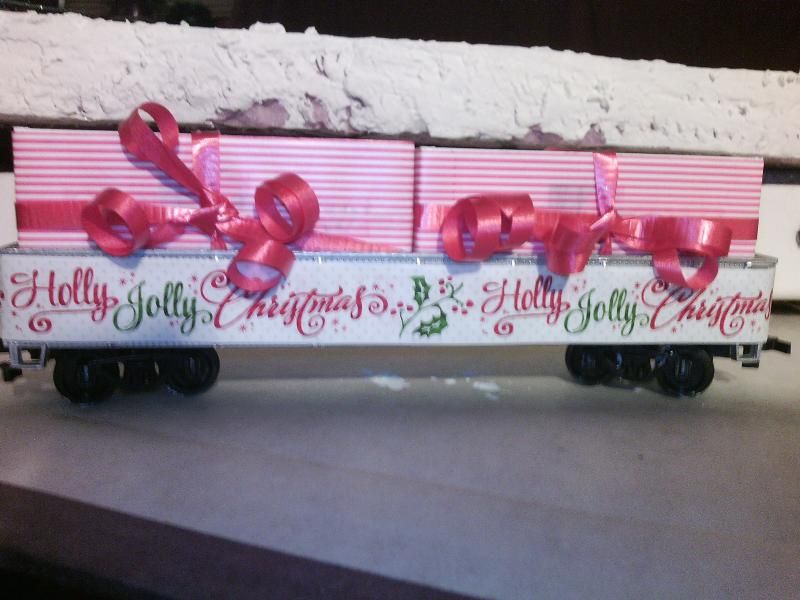
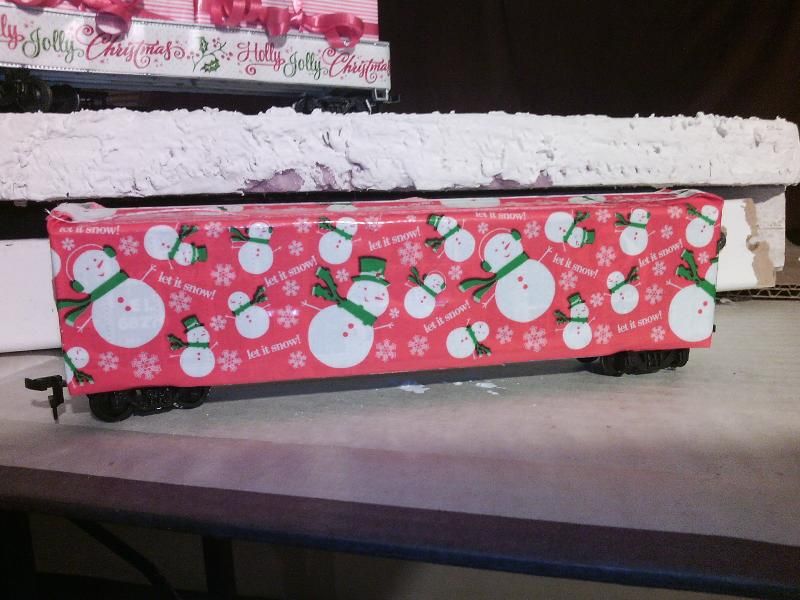
Tape, I found them at the Dollar Tree Dollar store, not sure if they have them where you live, just happened to spot them hanging near the xmas stuff. I don't think the narrow tape will be hard to remove, to be honest it seems to be lifting off already but it's not a permanent fix that I was going for any how, The snowman is cheap duct tape from the same store, it's nothing like the real deal duct tape so I think it might come off okay. Last year I wrapped the box car in Christmas wrapping paper and it worked great. Simple ribbon and bows taped on would work just as well too. I have seen the narrow tape at Walmart as well, just not sure where I seen it, probably by the wrapping paper area.
I managed to glue down the foam board and the track. I had to stop and actually do some house cleaning, it looked like the Bachmann train layout factory had taken over. Boxes and old track and lights not yet set up, wood scraps, soldering stuff, glue stuff, ballast stuff, scraped off old platform stuff. You name it it was every where. Unfortunately I don't have a large enough place to just have a room for this so, it is pretty much taken over the living room area. At least now I have a place for company to sit after cleaning up.
Ballast is still in the near future.
The new surface I did last night came out better than ever. Very pleased with it.
I think it is only up from here, a little at time and before I know it Jamestown 2014 will be unveiled!
#84
HO / Re: Help Need HO Scale Steam Locomotive that steams and whistles
September 21, 2014, 12:58:01 AM
Fellows!!! I appreciate all you're doing for me. Doc I appreciated your offer, at this time I will decline the offer. I am keeping the power box I have for now, I am going slow with the power, might turn it up a bit to get the smoke stack coil hot to get smoke but any other time it's slow going. Her job is to go nice and easy around town, Spread cheer as the by standers notice the holiday colored cars and wrapped boxes shes pulling behind her. Debate can go on if you all like, but my power box is staying. Now lets move on to what else I've been up to today.
Today was a busy one for Jamestown. I found just the perfect tape to decorated the cars. They are all different and pretty. I haven't decided what I want to do to the caboose, I think it will be lighted,
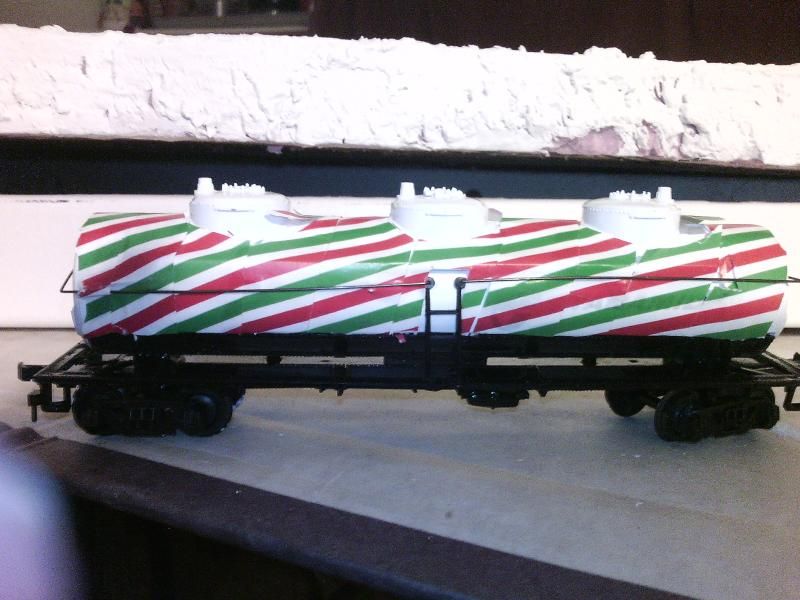
I wired longer leads from the track joiners to the power box. I soldered the two lengths together and then shrink wrapped them nicely. put on u shaped ends to screw into power pack. Shrink wrapped the also.
I put on u shaped ends to screw onto power pack. Shrink wrapped them also.

then I moved onto the platform itself. It was beat up, faded out, old looking surface so I mixed up my concoction of popcorn ceiling texture and white paint globed/rolled it on the whole thing..
Tomorrow clearing a path for the tracks, gluing them down (I think) and then looking into ballast.
Today was a busy one for Jamestown. I found just the perfect tape to decorated the cars. They are all different and pretty. I haven't decided what I want to do to the caboose, I think it will be lighted,


I wired longer leads from the track joiners to the power box. I soldered the two lengths together and then shrink wrapped them nicely. put on u shaped ends to screw into power pack. Shrink wrapped the also.

I put on u shaped ends to screw onto power pack. Shrink wrapped them also.

then I moved onto the platform itself. It was beat up, faded out, old looking surface so I mixed up my concoction of popcorn ceiling texture and white paint globed/rolled it on the whole thing..

Tomorrow clearing a path for the tracks, gluing them down (I think) and then looking into ballast.
#85
HO / Re: Help Need HO Scale Steam Locomotive that steams and whistles
September 20, 2014, 12:53:57 AM
thanks Irbricksceo, I won't use the AC side for anything, not even for lights. It affects how the DC side works so I will only use the DC side for my track.
thanks for your input.
thanks for your input.
#86
HO / Re: Help Need HO Scale Steam Locomotive that steams and whistles
September 19, 2014, 11:48:20 PM
Well didn't get very far tonight with all I had planned, spent most of the night just playing with Prairie. I have wanted since I got her to try and figure out how to add some train sound effects just for the heck of it and not spend a fortune on anything so I came up with a small hand held recorder, found some sound effects on line for free and this is what I came up with right now.
http://youtu.be/Oe98pvtF0Qs
I will hang on to both power packs just in case. I'm keeping it 2/3 or less throttle only because I am so afraid she will go flying off into la la land and crash and burn on the floor! Is VAC the same as Volts? that word VAC is on the power pack and was just curious.
After tearing up the old track and track bed, the platform is looking a little rough around the edges so before I adhere the EZ track down I am going to resurface the platform. Its a fast and easy thing to do. White paint, popcorn texture powder and water. You get snow. I have learned using paint, just flat paint it doesn't get powdering after it dries.
Not sure what to do about ballast, since everything else is snowy the track will stand out a bit. I am going to experiment two ways. the sand/gravel mix I have made up already and the material I use on the platform. I am only doing the edges of it right now. and I am going to take a very long time doing it, don't want anything to interfere with the new track. I also tried my tunnel and it won't fit. there isn't enough space for it to rest on the foam behind the track. I think I have solved the problem by just adding a small ledge for it to rest on. Should work, if not Plan B
Thanks all.
#87
HO / Re: Help Need HO Scale Steam Locomotive that steams and whistles
September 19, 2014, 07:04:32 PM
Since I don't know the answer, if I run the power on a slow speed is that okay or is 17 volts always putting out whether it goes fast or slow. These (I have two of the same) power supplies came with two different sets of Bachmann trains, both with brass rails. does that have anything to do with it, brass rails?. they are "vintage" now if you see them on EBay. They are older styles and did that have anything to do with it?
If I need a new one, any suggestion on a model? Doc said look for 12 volt ones right?
I am already eye balling changes I need to make to the platform for this new track but nothing that will be labor intensive. As I take off all of the houses, landscaping, lights etc, I am always working with a blank canvas more or less. I am glad it is Friday, my mind is going a mile a minute of what should I do next? I think working on the cars I will be using. Just wait til you see Jamestown this year!
#88
HO / Re: Help Need HO Scale Steam Locomotive that steams and whistles
September 19, 2014, 04:22:50 PM
I'm a proud momma! My little Prairie got her brand new EZ track, rail terminal joiner a little clean up of the wheels and track and she has been pulling 4 cars behind her so quite a while. No derailng no stop and go, no odd noises, just her doing her thing. I don't quite remember when I was so excited about a simple thing like this! She has more than enough power with the single joiner. I never was planning on running her fast, She's just going slow through town, that's her job.
I did find something interesting, I took a chance, hooked up a string of "running lights" I have that go around the outside of the track for ambient light to the AC side of the power supply, it worked but made the box hum more than it normally does but the interesting part is it affected the DC side and Prairie would only move at a very low speed even on full power so...... The ac side of this won't be used for anything. I never expected to use it so no big deal.
Boy oh Boy, can't wait to get off work and start getting this layout going. I am going to paint the cars Christmas decor or "wrap" them in Christmas paper like I had them, so not to ruin the actual paint on the cars but now these babies are mine and they are going Christmas!
Still would like to know about prototypical and model
She has more than enough power with the single joiner. I never was planning on running her fast, She's just going slow through town, that's her job. I did find something interesting, I took a chance, hooked up a string of "running lights" I have that go around the outside of the track for ambient light to the AC side of the power supply, it worked but made the box hum more than it normally does but the interesting part is it affected the DC side and Prairie would only move at a very low speed even on full power so...... The ac side of this won't be used for anything. I never expected to use it so no big deal.
Boy oh Boy, can't wait to get off work and start getting this layout going. I am going to paint the cars Christmas decor or "wrap" them in Christmas paper like I had them, so not to ruin the actual paint on the cars but now these babies are mine and they are going Christmas!
Still would like to know about prototypical and model
#89
HO / Re: Help Need HO Scale Steam Locomotive that steams and whistles
September 19, 2014, 12:24:46 PM
Good morning! Just checked and my EZ track is out for delivery . Best thing about ordering from OmniModels they distribute from Reno. Which means after work I get to work on the track. My gut instincts is telling me this will be the ticket. No more problems. Well at least not in the track department! If I need to add more feeder wires I am confident that I can do that. I did notice that guys video we are referencing didn't do such a good job on the joint, even I noticed that and wondered is that right? I thought the wire he used looked a bit over kill. See why I ask for your help/advice! I do have feeder wire joiner coming with the track, it was three bucks or so, they are all the same right? Atlas, Bachmann, etc, the joiners will fit all of those tracks? If it needs more power I will either buy another one or solder my own.
I will not use the foam track bed.
I am familiar with the polarity wire, (like extension cords, speaker wire has it also) usually white dash or some thing as you said to avoid shorting things out. The power supply box came with the track and cars I bought, actually I ended up with 2 of them. I will be the only one operating this as I don't want Prairie flying off the track and smashing. Last year I fiddled around a little using the AC side for lights, fried a little strand of lights I had, that made me decide to stick with what I know. Over half of my lighting is run off of adapters that reduces the amps or volts or whatever it might be called. They aren't meant to be connected with several strands at once but I have and so far so good. 75% of the small lights are Lemax designed for Christmas village or miniature dollhouse, etc. Each set of lights comes with a little box to be used with batteries or plug/lead in the adapter to it. Four leads to one adapter. This is the box the power supply comes in.

I am also familiar with shrink tubing, did all my light connections using it. Great little invention.
I will leave lubing alone for now. I watched this video about care and maint. of the loco, should I oil the outside moving parts? at 4:16 or so he is oiling the wheels and other moving parts. I have noticed the little bit I have run the loco it sometimes made for the lack of a better word screeching sounds? I think it was the wheels on the brass track, made me think that sounds like something needs oil. If so what kind of oil? Here is that video.
http://youtu.be/OtW8Gx_WxL4
One last question for this post. What is the difference between prototypical and model. I noticed prototypical was mentioned a lot in a old posts.
. Best thing about ordering from OmniModels they distribute from Reno. Which means after work I get to work on the track. My gut instincts is telling me this will be the ticket. No more problems. Well at least not in the track department! If I need to add more feeder wires I am confident that I can do that. I did notice that guys video we are referencing didn't do such a good job on the joint, even I noticed that and wondered is that right? I thought the wire he used looked a bit over kill. See why I ask for your help/advice! I do have feeder wire joiner coming with the track, it was three bucks or so, they are all the same right? Atlas, Bachmann, etc, the joiners will fit all of those tracks? If it needs more power I will either buy another one or solder my own. I will not use the foam track bed.
I am familiar with the polarity wire, (like extension cords, speaker wire has it also) usually white dash or some thing as you said to avoid shorting things out. The power supply box came with the track and cars I bought, actually I ended up with 2 of them. I will be the only one operating this as I don't want Prairie flying off the track and smashing. Last year I fiddled around a little using the AC side for lights, fried a little strand of lights I had, that made me decide to stick with what I know. Over half of my lighting is run off of adapters that reduces the amps or volts or whatever it might be called. They aren't meant to be connected with several strands at once but I have and so far so good. 75% of the small lights are Lemax designed for Christmas village or miniature dollhouse, etc. Each set of lights comes with a little box to be used with batteries or plug/lead in the adapter to it. Four leads to one adapter. This is the box the power supply comes in.

I am also familiar with shrink tubing, did all my light connections using it. Great little invention.
I will leave lubing alone for now. I watched this video about care and maint. of the loco, should I oil the outside moving parts? at 4:16 or so he is oiling the wheels and other moving parts. I have noticed the little bit I have run the loco it sometimes made for the lack of a better word screeching sounds? I think it was the wheels on the brass track, made me think that sounds like something needs oil. If so what kind of oil? Here is that video.
http://youtu.be/OtW8Gx_WxL4
One last question for this post. What is the difference between prototypical and model. I noticed prototypical was mentioned a lot in a old posts.
#90
HO / Re: Help Need HO Scale Steam Locomotive that steams and whistles
September 19, 2014, 12:08:16 AM
I am still smiling and remembering all the post I just finished reading and it started with Jonathan and his night lights. He will be next in the line of fire once this track is up and running, I am going to pick him brain till sawdust comes out! There was quite a discussion on many topics. Us New Yorkers called them smug pots. So I guess we are all dating ourselves with them. Hopewell Junction!!! My daughter, son-in-law and family lived in HJ for a year or so and now moved to Beacon, NY. My Son-in-law is an instructor at the Fishkill Correction Facility. I actually stayed last April on the grounds where they live. Strange seeing inmates out your front window picking up trash and mowing lawns. I am from the Catskill Mts. outside of Ellenville (which used to be a nice thriving little town when I grew up there). My dad was born in Brooklyn moved to the country on a farm when he was 7. Small world sometimes.
Okay getting off track oh excuse the pun! I went and watched the info on removing the rail joiner on the EZ track, good to know in advance. I am not so concerned about saving it (joiner) I am more worried about ripping the rail loose so I will be extremely cautious doing that. Thank you for sharing that!
HA! I knew I didn't need those stinkin rerailer terminal things! I found this how to and would like your opinions if this is a good way to do the feeder wires, it starts at 2.25 or so. http://youtu.be/8QdzJZmgVfw
Where might one buy conductive lube? Also should I be buying grease, lube, etc for Prairie or is she good for a bit before she might need maint? I tried to open her up, worse day in my life I think, I know how Jonathan felt about Connie. I didn't get the cab off of her, I made the mistake of unscrewed a screw that didn't need to come out and the little tin part that has those oh so tender feelers on them that I am guessing supplies the power to those wheels. there was 6 of them to get safely back into place. I have quite a time getting that all back together. I probably won't ever attempt that again. I will just send her to Jonathan when she needs TLC!
Back to supplying power to the track(s). in the video I posted, he has a black wire and a white wire on each side of the rail Jbrock77 - is this what you mean by north and south rail? So IF I need more power to more tracks I can hook all the black wires together to one side of the power supply and all white wires together onto the other side of the power supple (on the dc side of the power supply of course). Is that correct?

This is the power supply I have. This photo happens to have the small pin connector that would go to a terminal rail, I am not using it, just happened to be connected when I took this picture. What gauge wire would I want to use? Stranded or not? Sorry not sure what the solid wire is called. that is the type of wire the guy used. AS I am a novice at this, it would be smart for me to choose two colors to do this, whether I get black, red, white, or any other color out there. one color is for the north and the other for the south right?
I will do two sides of the oval, probably the straight sides, would be easier right then trying on curves? I am getting better at soldering well maybe not better but understanding the method to the madness better. Tinning the wire makes sense to me now.
One last question. EZ track is just a plastic bed, not really track bed right? Since I have new foam track bed left over can I use it under the ez track or will it not work? or is it a waste of time and energy? Does it have any purpose if I do use it? make it run quieter?
Need to sign off, Reno is under extreme unhealthy air quality due to the King Fire south of us. My eyes, throat and nose are irritated and I haven't gone out all day, it is just saturating everyplace. Thanks as always for all your expert advice.